In this tutorial, we’ll explain how to use the blend tool in Adobe Illustrator to repeat just about anything. It's a handy trick to know when designing your business folders, custom envelopes, or any business presentation or marketing materials.
Let’s jump right into this Illustrator Blend Tool tutorial
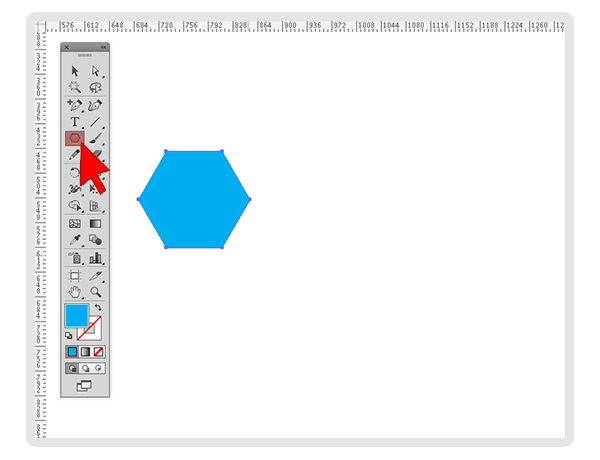
Step 1
Create the object you want to repeat. For this tutorial I will be using a simple hexagon shape (Hold shift while creating to keep the bottom surface flat). Note: You may have to click and hold your cursor over the shapes icon in the tool window to get to the hexagon shape.
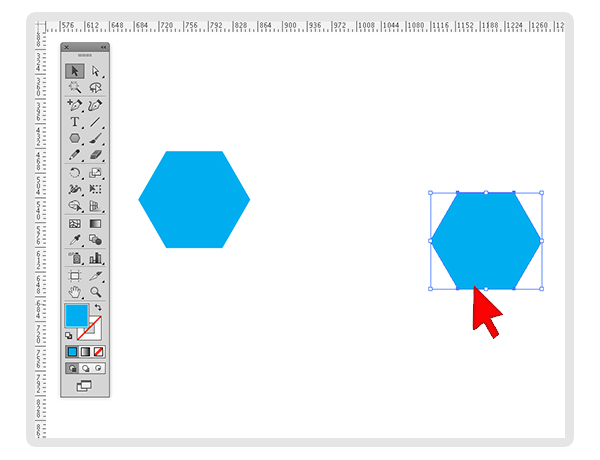
Step 2
Choose the selection tool and make a copy and paste the hexagon next to the original. Note: Copy (command+c Mac / control+c Windows) / Paste (command+v Mac / control+v Windows)
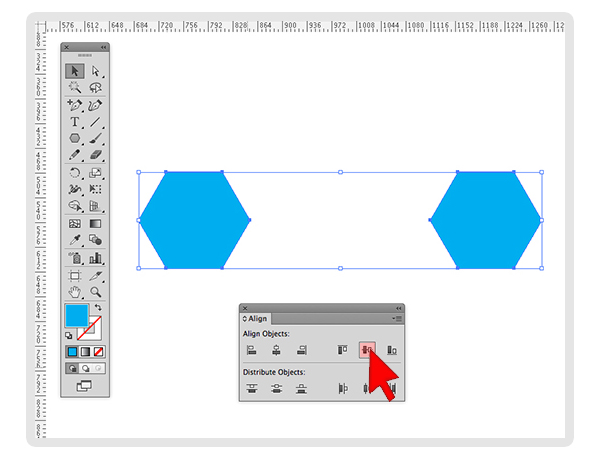
Step 3
Select both hexagons and using the align window (to open go to Window | Align) choose to “Vertical Align Center”.
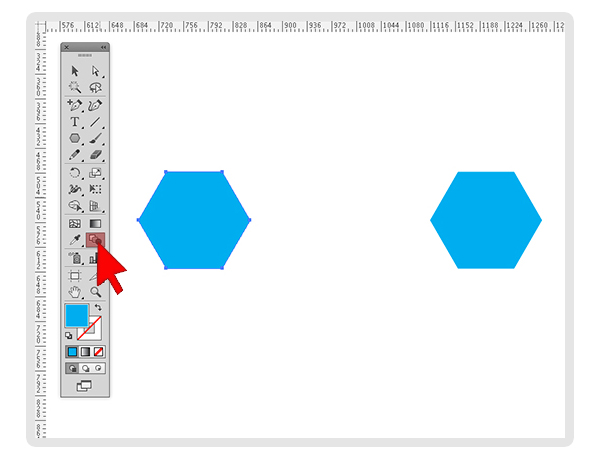
Step 4
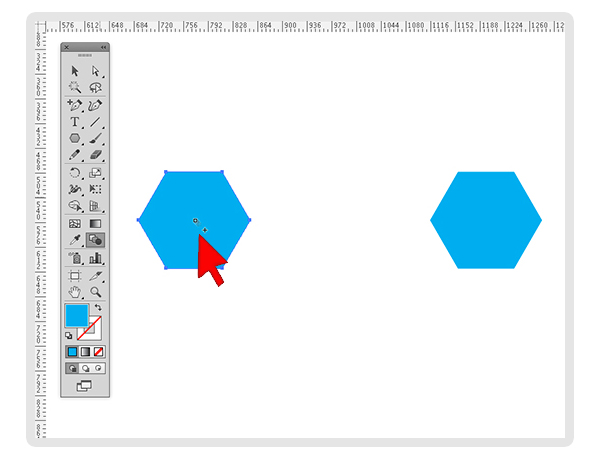
Next select only the first hexagon and then choose blend icon in the main tool window.
Step 5
Take you cursor and click once in the center of the first hexagon.
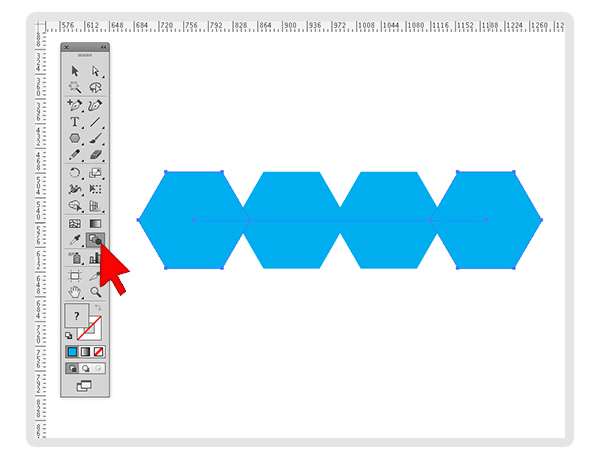
Step 6
Then click once in the center of the second hexagon.

Step 7
You now should see them blended together. You will have to adjust your blend settings. With the blended object selected double click on the blend icon in the tools window.
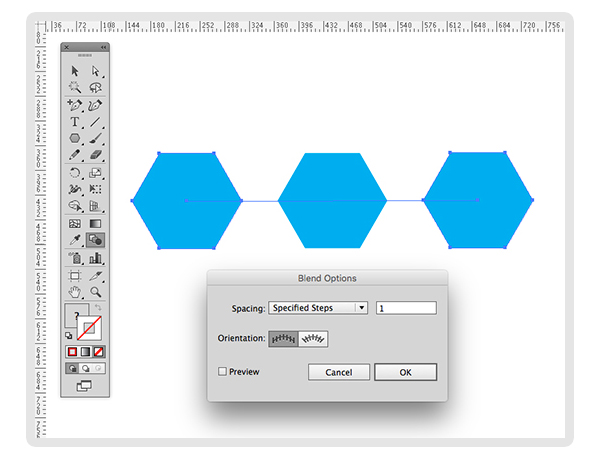
Step 8
Play around with the blend options to achieve the right amount of repeating objects within the space.
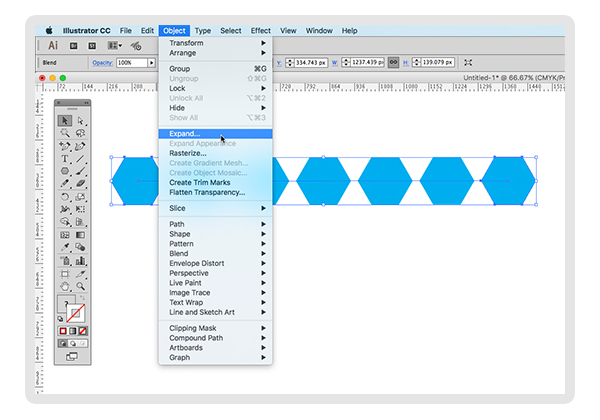
Advanced
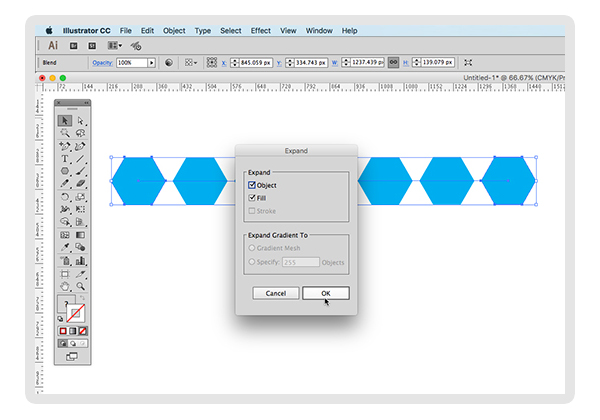
Add more flexibility by making each object into a vectorized piece by expanding the blend (Object | Expand).
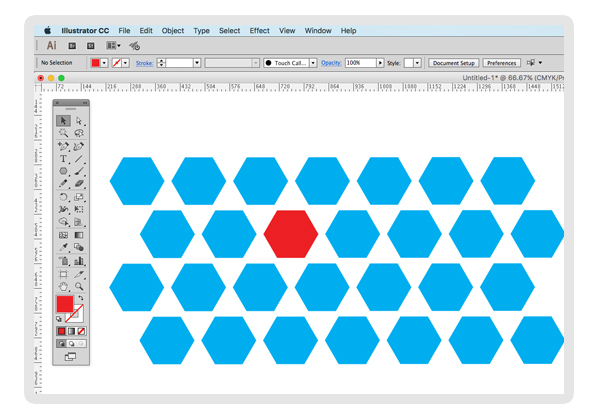
Now you can copy and paste to repeat them on individual lines. Even change just one of the hexagons to another color :)
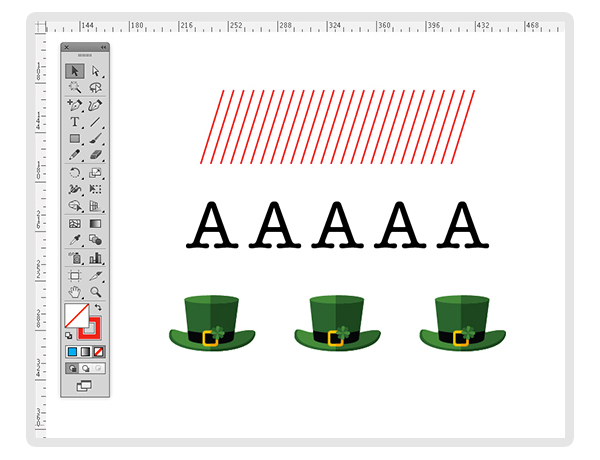
Try using the blend tool with other object such as lines, text (you will need to outline first) or even a icon.
We hope you enjoyed this tutorial.

